
Quick Links:
- pre-order v13
- changes from v11/12
- optional features
- cutting the running board cover
- info about the previous version
- faq
- hinge mounts!
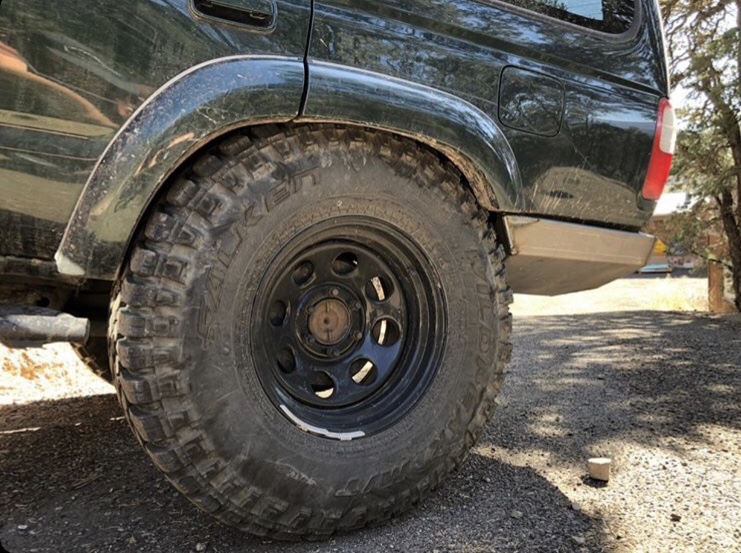
If you want a great-looking, radically high-clearance, crawling-inspired bumper designed around 35s (but with room for 37s) for your 3rd gen 4Runner, I’ve got you covered.
About this bumper:
I’ve been designing & prototyping this bumper for a few years now (- this is version 13 and is pretty much the finalized design, I think)
It came about as problem-solving after I designed F150 fuel tank conversion brackets for the 3rd gen 4Runner to relocate the tank to the spare tire position. That kit was designed around a rear mount that is a weld-in rear crossmember – which ties the open frame rails together for strength, but as a result, typical aftermarket bumpers would not mount directly and a new bumper solution was needed. Accordingly, my bumper requires that rear crossmember for its primary mounting locations (but that gives you the option of using the F150 tank in the rear or retaining your stock tank in its original location – whichever you prefer.)

Design Origins:
From the beginning, I designed this bumper to use the factory running board plastic step cover from the early 3rd gen 4Runner (the one with Toyota embossed on it). I knew that for any high clearance, crawling-oriented design, the receiver pin access needed to be from the top side, and the receiver had to be completely encased in the rear face of the bumper to maximize departure angle. Therefore, the plastic running board cover was a natural solution to capping off the access holes in the top of the bumper. (It also cleans up one of the two inelegant gaps between the bumper and the hatch that exist with most aftermarket bumpers.) The plastic step cover, then, determined the depth of the bumper from the hatch opening to its rear face, and the dimensions of the receiver itself determined the overall height of the rear face.


Then, during the design process, I discovered the hand-built Assburns rear bumper, which ultimately became the muse for this one – his is still the most radically high-clearance bumper I’ve seen for our trucks, and with his approval, I did my best to emulate its’ clearances while not requiring major cutting of the body. By basing my design around a 1″ body lift (I run 1.25″ for the maximum bumper gap when flexing) I’ve been able to do just that, and achieve the rear departure angle that I was after.
Body Lift vs. non-BL:
When I launched this bumper I had a fair number of inquiries about installing it without a body lift. To accommodate those guys, I’ve now redesigned most of the bumper for versions 12+ so that you can configure it for a non-body lift application when ordering (I still recommend using a body lift on the 3rd gen 4Runner for multiple benefits (you can read about my reasoning on that subject here))


Auxiliary Lighting:
With my background being what it is, I did my best to angle the planes on the corners under the taillights in such a way as to carry the arc from the hatch (side view) into the bumper, so that it wouldn’t have a “block under the back of the truck” look. Aesthetics aside, these angled faces present a terrific opportunity for positioning auxiliary reverse/scene lighting, so I’ve included mounting holes for reverse-mounting the Rigid Industries IGNITE back up light kit (20641).


Width vs. Flare Width:
I’ve tapered the front of the bumper to just wider than the body itself to keep it narrow for tight trail work, to avoid interference with obstacles. This makes it narrower than the stock SR5 flares and mirrors the cut-off flare look in the front when the running boards are removed, which I like, personally – however, for those of you who prefer flare-width bumpers, I offer flare extensions .stl files for both the early SR5 (as shown) and later Limited (wider, body-colored) flare widths to carry that width down onto the bumper that you can 3D print yourself locally. (just let me know that you want them and I’ll email them to you.)


Body Modification:
I’ve cut the forward edges of the bumper back and angled them appropriately to allow you fully stuff a 315 up to the short factory bump stops, or a 37 up to the commonly-used extended bump stops. Due to this, installing the bumper requires trimming back the pinch weld on both sides.

Recovery Points (shackle hangers):
From version 12 on, the recovery points are fully machined from 1-inch thick A36 steel, with generously radiused holes for use with soft shackles. They’re custom-made for this bumper to maintain the rear departure angle and maximize clearance, as well as carry the loaded weight of swing-out accessories. (That’s right, I’ve released removable hinge assemblies for this bumper, so you guys can build swing-outs and accessories as you see fit. – see the bottom of this page for ordering info.)

Exhaust Clearance:
And since this design was originally intended for maximum ground clearance, I’ve put a hole in the right side for the exhaust to be run over the frame and behind (not under) the bumper on body lift applications.

New Features:
To accommodate non-body lift applications and to create a more inclusive kit, I’ve made a number of revisions to the internal structure from the previous version. These center around a new, 3-piece inner receiver support that is designed to clear the rear crossmember when the bumper is installed without a body lift. No longer does the end-user need to source additional steel to install a receiver, as this new support is contoured to directly accept the included receiver tube.
Also, the primary mounts are now contoured to reinforce the new support arrangement, and all of the components that make up the center section of the bumper are now slotted and tabbed for ease of alignment during assembly. Weld slots are included where they are useful to ease alignment and assembly.
Non-Body Lift applications include all-new risers for both the frame rails and the crossmember (6 pieces total) and shim and washer plates where the bumper wings are secured in the wheel well (4 pieces total). As with the receiver support detailed above, these new components are tabbed and corresponding slots have been included in the center section and bumper wings for alignment and ease of assembly. (non-BL users will need to enlarge specific holes for bolt and tool access during assembly)
And as previously mentioned, the v12+ recovery points are now fully machined from 1″ A36 steel to reduce overall construction time for the installer.
Also brand-new for v12+ are additional weld-in wing brace assemblies, to stiffen and reinforce the wing at the wheel well opening against side impacts during off-road use.
In all, every major component has been revised and 16 new components have been created for versions 12 and later. V13 gets revised wings with a better body gap and overall shorter dimensions front-to-back and more adjustment at the frame for a better overall fit.
What you get:
The standard bumpers are made up of 1 rear crossmember, 3 major pre-formed pieces, 2 recovery points, 3 receiver braces, and 4 smaller brackets that are assembled and welded on the truck for ease of fitment. In fact, the bumper shown in all of these photos has simply been bolted to the frame, no welding has occurred – so as you can see, it’s more or less self-aligning prior to welding.
The non-body lift option will include 6 additional brackets and 4 new shim and washer plates.
I’m also including a pair of nut-strips and all hardware needed for installation, a receiver tube, and additional weld-in wing bracing.
Please remember, if you already have the rear crossmember from my fuel tank relocation bracket kit, you’ll need to let me know when ordering so I can deduct it from your order.

Options:
- v11 bumper owners can add the optional weld-in wing brace assembly
- v11 bumper owners who haven’t assembled and installed their bumpers can order the non-body lift installation components (tabs that penetrate the center section of the bumper will need to be removed for use with v11)
- v11 and v12+ owners can retrofit the swingout hinge assembly (both left and right-handed versions) – now in production (see bottom of this page)
- v11 and v12+ owners will be able to retrofit the flare-width extensions (different .stl files for v13 vs v11/12)
What you need to provide:
You’ll need to provide the early OEM running board cover from the 1996-1997 models for the top of the step (this covers the access holes and finishes off the top of the bumper – see the quick links at the top of this page for measurements for trimming it to fit) and the aux reverse lights (if you choose to run them)
Important notes:
*The bumper requires the rear cross member from my fuel tank relocation bracket kit as its basis, so if you already have one of my kits you’ll need to let me know at the time of ordering so I can remove the cross member from your order.
*The standard bumper requires a 1- 1.25″ body lift. Non-BL applications will require the optional conversion parts as discussed above.
*You will need to cut out the pinch weld in the rear of the wheel well on each side. The bumper is designed to provide full articulation with 35″ tires and clearance for 37s when using extended bump stops.
*I strongly advise the use of poly body bushings on the rear body mounts at a minimum to minimize flex & potential body contact when wheeling.
* As usual, I cover the shipping – so I’m unfortunately not able to ship outside of the continental US.
Q & A:
Body Mounts
Q – You recommend running Sonoran Steel’s upgraded body mounts to avoid bumper flex into the body?
A – At a minimum, yes. However, I redid did all of the body mounts on my 4Runner (energy suspension), because the front will have the same issues with flex. IMO everyone should go to poly mounts if they’re going to run any aftermarket bumper on a 3rd gen 4Runner. (plenty of threads on this – too much chance of body damage with factory mounts)
*Regardless of what mounts you use, make sure to measure your stack height (height of mount and body lift puck combined) of the rear mounts to ensure that it totals 2.25-2.5″ – if it does not, contact me for additional spacers.
Receiver
Q – Does your bumper design have a receiver built-in?
A – The bumper has provisions for a Buyers Products RT25806 receiver, which is now included in the bumper purchase for versions 12+.
Q – What is the tow rating on your bumper/receiver?
A – There is no tow rating applicable; this is a weld-it-yourself kit, so please note that for all intents and purposes, I consider the receiver to be simply an accessory mounting solution and an additional recovery point as/when needed.
I have done my best to brace and reinforce it internally for off-road uses, but its strength and durability are ultimately determined by the skill and competency level of the installer/welder.
Assembly
Q – I probably missed it, but will the bumpers be pre-bent just requiring welding?
Q – Will It come pre-welded or have the option to order the panels and weld it yourself?
A – The bumper components are pre-bent, all welding is done by the end-user at this time.
Q – Looks like it’ll be a lot of fun to work with the nut-strip in the frame, any solution to making that alignment to get the bolts started easier since it looks like it’s not easily accessible with this design.
A- The included nut-strips (I’m providing them since most of ours are so rusty at this point) can be installed through access holes I’ve included in the rear crossmember for this purpose.
Fuel Tank
Q – Will it work with a standard fuel tank or does it require your F150 mod?
A – It requires & uses my rear crossmember, but the tank can remain in the stock location.
Q – Are you building a bolt-on gas tank skid that will go in conjunction with the bumper?
A – I am! Look for that next year.
Swing-outs
Q – Is this bumper available with a swing-out option?
A – I’ve developed a hinge assembly for you guys – it is a removable double-shear mount, and you guys can make whatever you want to hang from it. I’ve included pilot holes in the bumper to correctly position it on either side, so it will retrofit to an existing bumper. Check it out at the bottom of this page.
Flares
Q – Will these be available for limited models? To sit flush with the flares?
Q – Will you be able to add a drop-down menu for extra width? For people with no flares, sr5 flares, and limited/sport/bushwhacker flares?
A – the bumper is designed for crawling so it’s as tight and as clearanced as I can get it – however, I’m offering flare extension .stl files for folks who want that aesthetic. Just let me know you’d like them and I’ll send them out to you (or your buddy with a 3D printer.)
Step
Q – The sides of the rear trim valence need to be chopped? Seems like you made the curvature in the bumper to accommodate the plastic trim? But the picture shows it trimmed up pretty good
A – I designed it to use the factory running board covers from the early 3rd gen 4Runner (with the Toyota logo). I’m surprised no one else has done this since they’re plentiful and basically free nowadays. You’ll need to provide your own, but I’ve included instructions on how & where to trim them in the quick links at the top of the page.
Weight
Q – Any idea of overall weight?
A – The shipping weight of the base bumper and crossmember once boxed and packaged is 126 pounds (add 10 pounds or so for hardware and recovery points which ship separately.)
Aux Lights
Q – do you have a link for the specific lights you spec’d the rear holes for?
A – they’re for Rigid Industries IGNITE back up light kit – 20641.
Exhaust
Q – Integrated hole to tuck exhaust into?!?!
A – Yes! I set it up so you can go over the frame at the rear of the wheel well and out the side of the bumper (with a 1″ body lift and some pinch weld trimming) – even with a rear-mounted fuel tank.
Pre-Orders:
Since there is so much up-front cost with this particular product, I produce these in runs of 12 and take pre-orders on every new run of bumpers. Occasionally I have one or two remaining in inventory after a manufacturing run, but these sell out quickly and as such are not a regular stocking item.
To pre-order simply email me at [email protected] with your full name, telephone number, billing & shipping addresses, and indicate that you want in on the run. Please also indicate whether or not you already have my fuel tank relocation kit, and if not, whether or not you’d like the additional fuel tank relocation front brackets included with your bumper order. Also, indicate if you want the non-body lift installation option.
Pricing is as follows:
- v13 standard bumper (for 1-1.25″ body lift) – $975
- non-body lift option – add $135
- front tank relocation brackets – add $50 (with bumper purchase)
- rear bumper hinge mounts – add $263 per side
On any given product run: when I get 10+ commitments via email, I’ll send out PayPal invoices to you guys for a 50% deposit, and once those deposits are in, I’ll submit the order to my bend shop.
My bend shop typically takes 6-8 weeks to turn around an order, so the sooner all the deposits are in, the shorter the overall duration will be, and the quicker I’ll be able to start shipping your bumpers out to you. Getting your deposits in quickly helps the other guys in the run too!
The balance will be due when the bend shop completes the order – I’ll send a second round of PayPal notifications at that time.
Refund of deposit:
Out of fairness to the other folks who have pre-ordered, your deposit will be considered non-refundable to complete the bend shop work. That said, if for some reason you need to bail, I’ll reimburse your deposit when the next client takes your spot in this manufacturing run, so as not to delay delivery of everyone else’s bumpers.
Sound good? Email me!
RBHM
Finally! the Rear Bumper Hinge Mount assemblies are ready to go – choose driver’s side, passenger’s side, or both -depending on your specific needs.
Each kit comes with a WIY hinge assembly, including spring pin lock, bearings, races, and seals; and a couple of pop rivets, specifically-sized drill bit, and drill guide plate for making the holes in the correct locations on your bumper. (You will need to provide a step bit or various increasing sizes to enlarge the diameter of the pilot holes)
This is the HINGE ASSEMBLY ONLY. You will need to build the swingout yourself, in what ever design is appropriate for your specific needs.